Adding Shortcuts To An App - Part Three
In the previous post we looked at adding parameters to a Shortcut action in iOS13 that:
- accepted multiple values
- accepted custom file types
- were enums
- were conditional with a child/parent relationship
- provided a calculated list at run time
Since then, iOS14 has been released along with some exciting new features in Shortcuts, which are detailed in the ‘What’s New In SiriKit & Shortcuts’ video from WWDC 2020.
In this tutorial, we’ll be exploring 4 new areas:
- In-App Intent Handling (accessing data directly from our app)
- The new ‘visual list’ API
- How to interact with Shortcuts using the new Swiftui app model in iOS14
- Outputting custom types
You can find the complete project up to the end of this tutorial on GitHub.
Step One
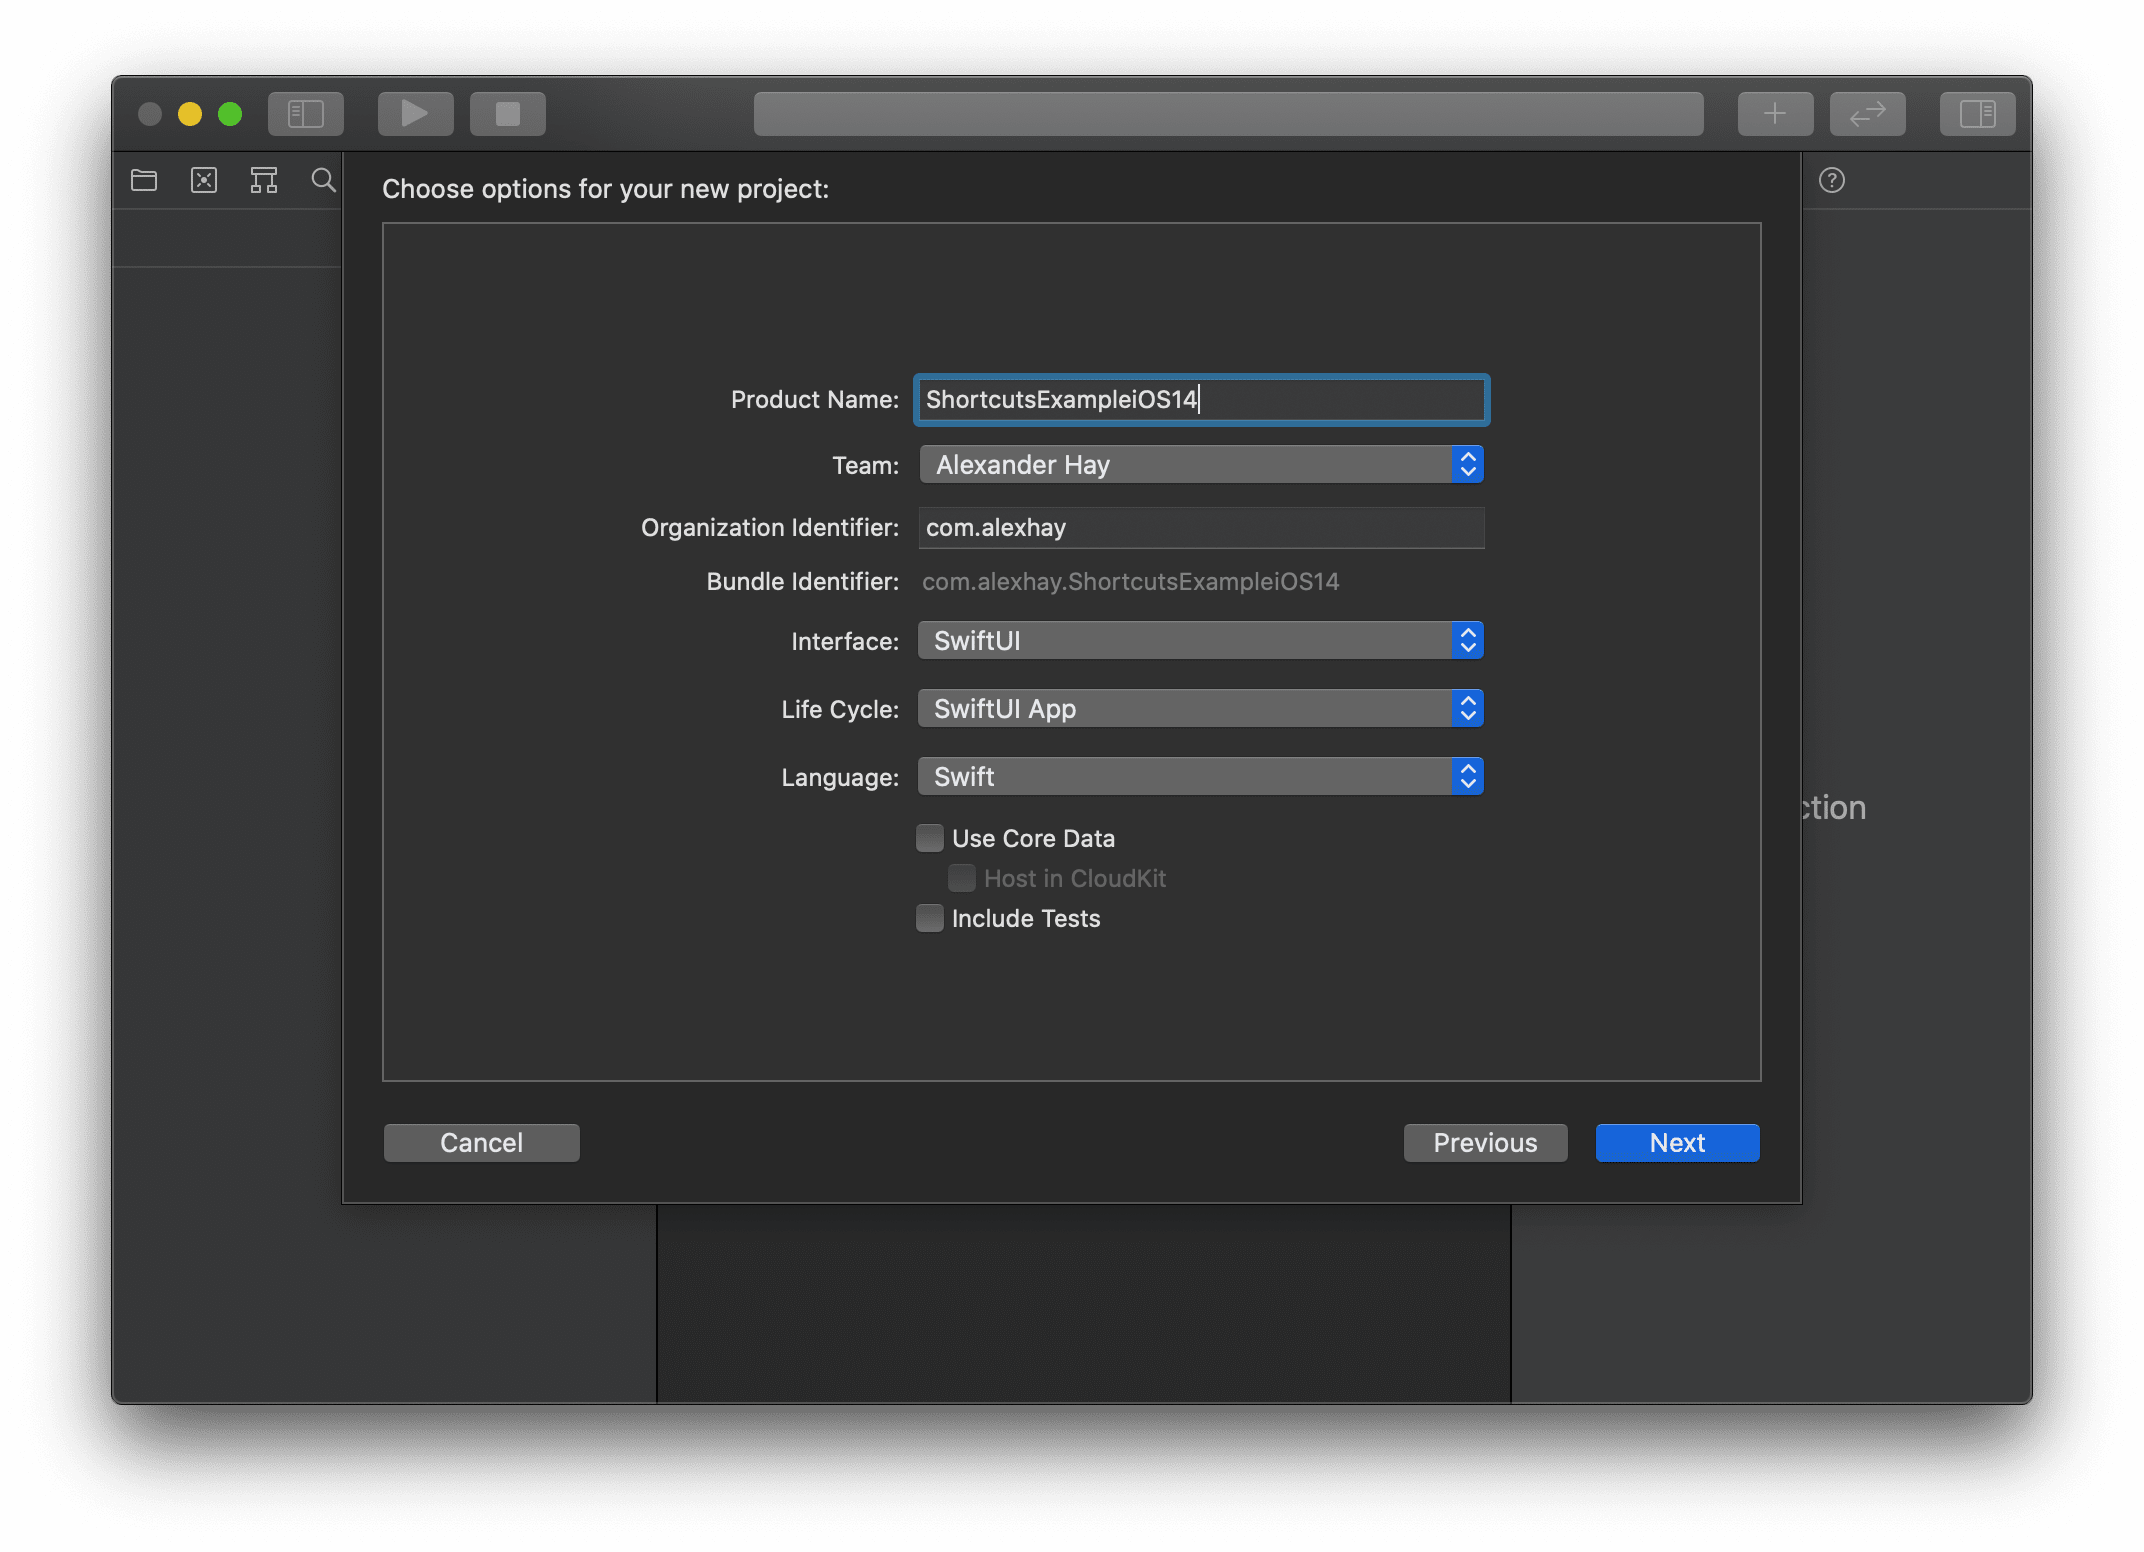
Firstly, let’s create a new project.
We’ll use the SwiftUI interface and the new SwiftUI App life cycle, which is new on iOS14 and does away with the familiar SceneDelegate & AppDelegate ways of handling the life cycle of your app.
Step Two
Let’s create some dummy data. I’ve added a new file called People which defines a new Person struct and an array of Person populated with 3 entries.
import SwiftUI
import UIKit

struct Person {
	var id: Int
	var name: String
	var job: String
	var iconName: String
}

let peopleArray: [Person] = [
	Person(id: 1, name: "Joe Bloggs", job: "Artist", iconName: "paintpalette"),
	Person(id: 2, name: "Peter Roberts", job: "Taxi Driver", iconName: "car"),
	Person(id: 3, name: "Sarah Love", job: "Author", iconName: "text.book.closed")
]
Step Three
Now create a new SwiftUI file called PeopleViews and we’ll create two new SwiftUI views.
import SwiftUI

struct PeopleListView: View {

	var people = peopleArray

	var body: some View {
		NavigationView {
			List(people, id: \.id) { person in
				NavigationLink(
					destination: PersonDetailView(person: person),
					label: {
						Label(title: {
							VStack(alignment: .leading) {
								Text(person.name)
								Text(person.job)
									.foregroundColor(.secondary)
									.font(.caption)
							}
						}, icon: {
							Image(systemName: person.iconName)
						})
					})
			}
			.navigationBarTitle("People")
		}

	}
}

struct PersonDetailView: View {

	var person: Person

	var body: some View {
		VStack {
			Image(systemName: person.iconName)
				.font(Font.system(size: 100))

			Text(person.job)
				.font(.callout)
				.navigationBarTitle(person.name)
				.padding(.top)
		}
		.padding()
		Spacer()
	}
}

struct PeopleViews_Previews: PreviewProvider {
	static var previews: some View {
		PeopleListView()
	}
}
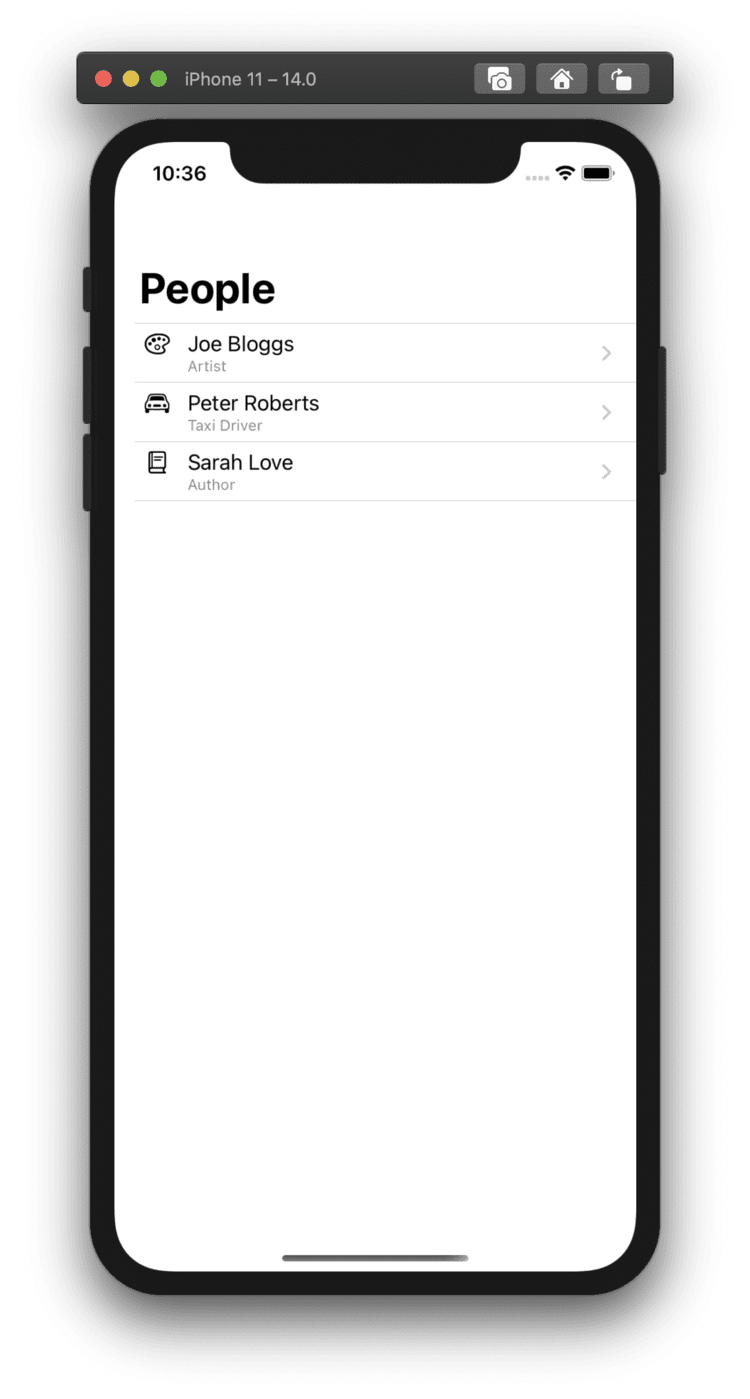
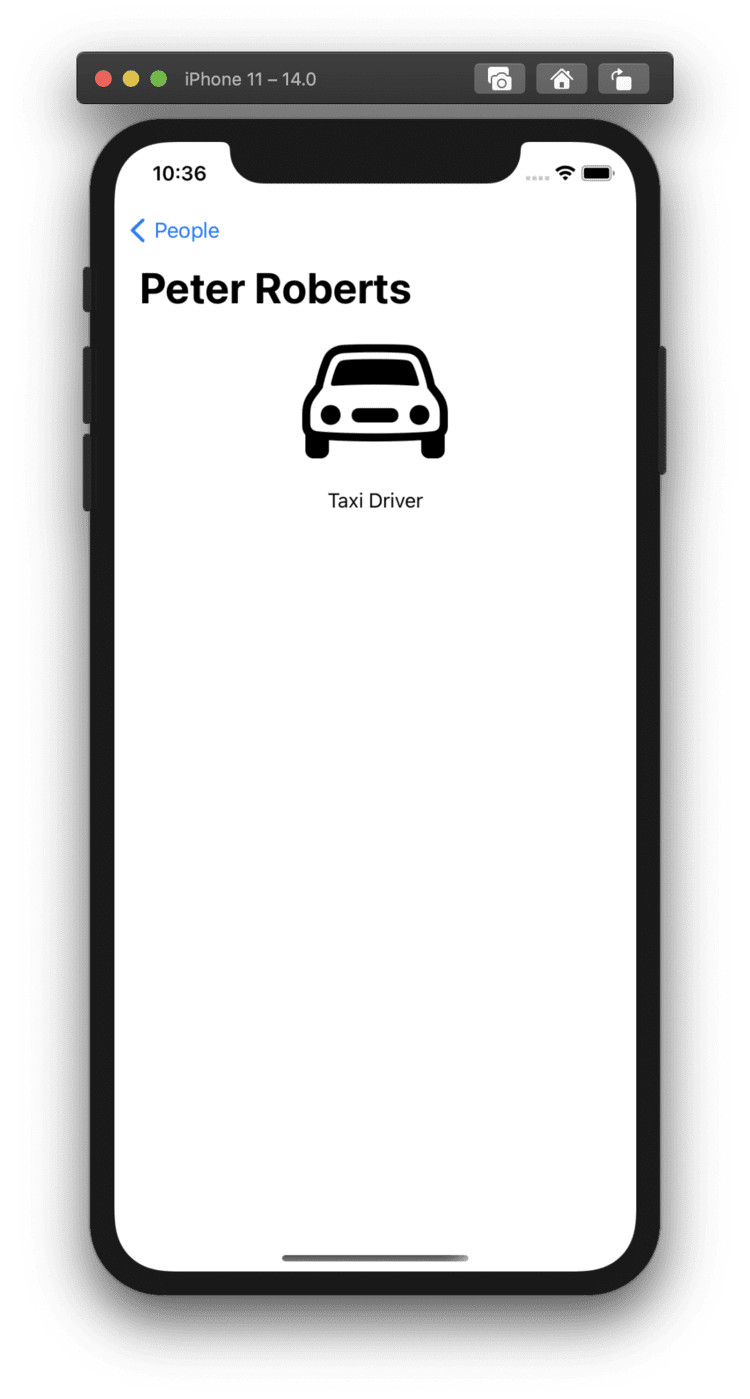
PeopleListView shows a list of our dummy people and PersonDetailView is displayed when we tap on one of the names in the list.
Step Four
Now go to the ShortcutsExampleiOS14App.swift file and change the default ContentView() to PeopleListView() as the new entry point to our app.
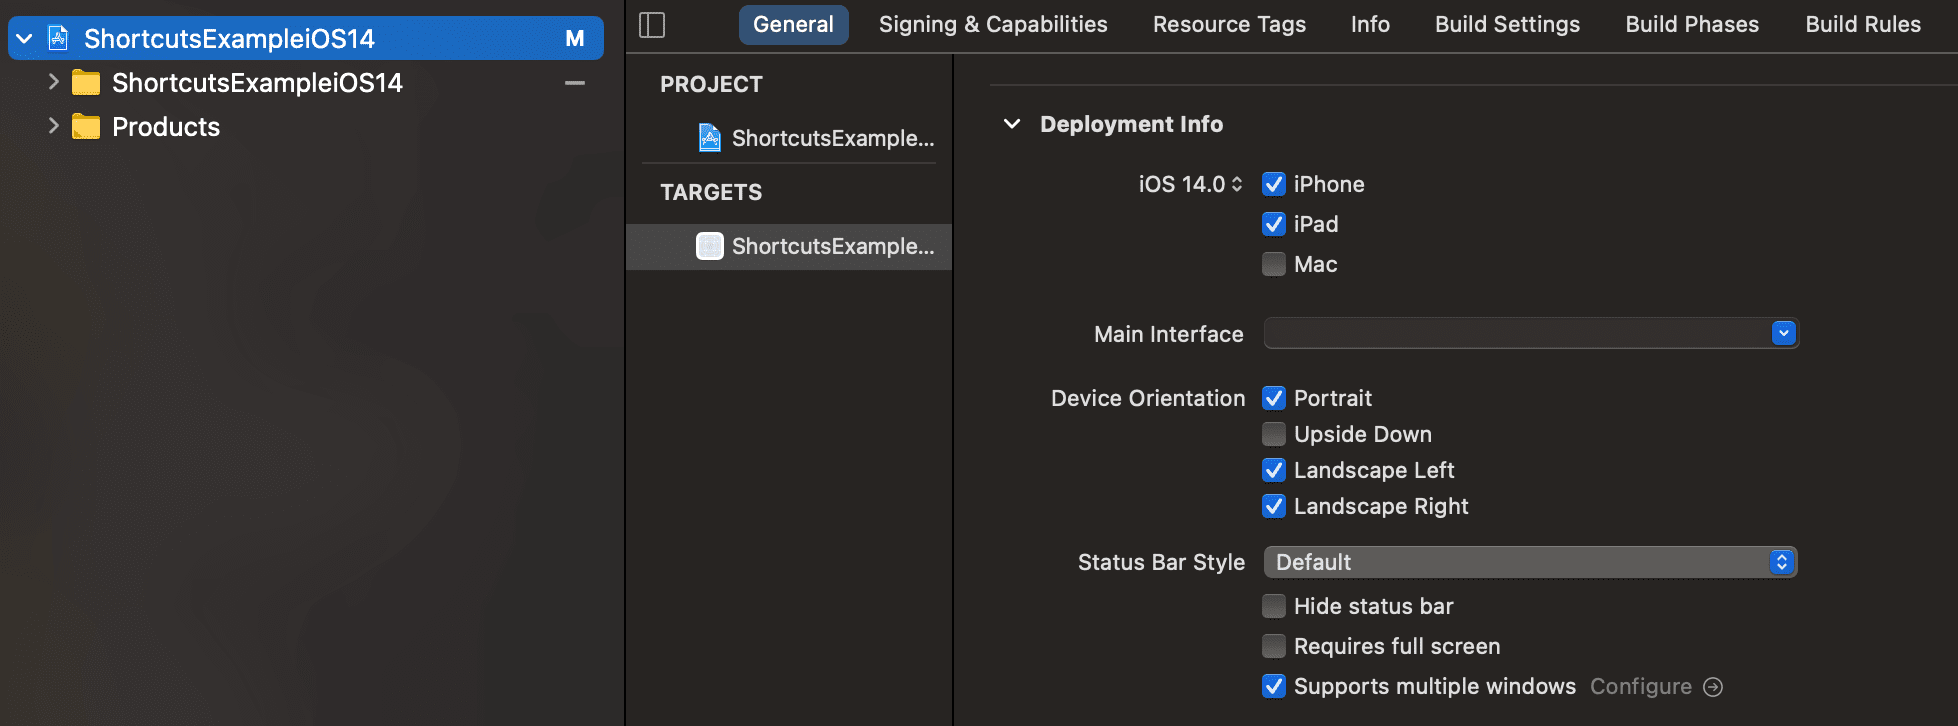
To use in-app intent handling, we also need to make sure that our app supports multiple windows. Navigate to your app’s preferences and make sure ‘supports multiple windows’ is ticked.
Now build and run and you can see our simple dummy views in action.
Step Five
Now that we have our simple app set up, let’s start adding functionality for Shortcuts.
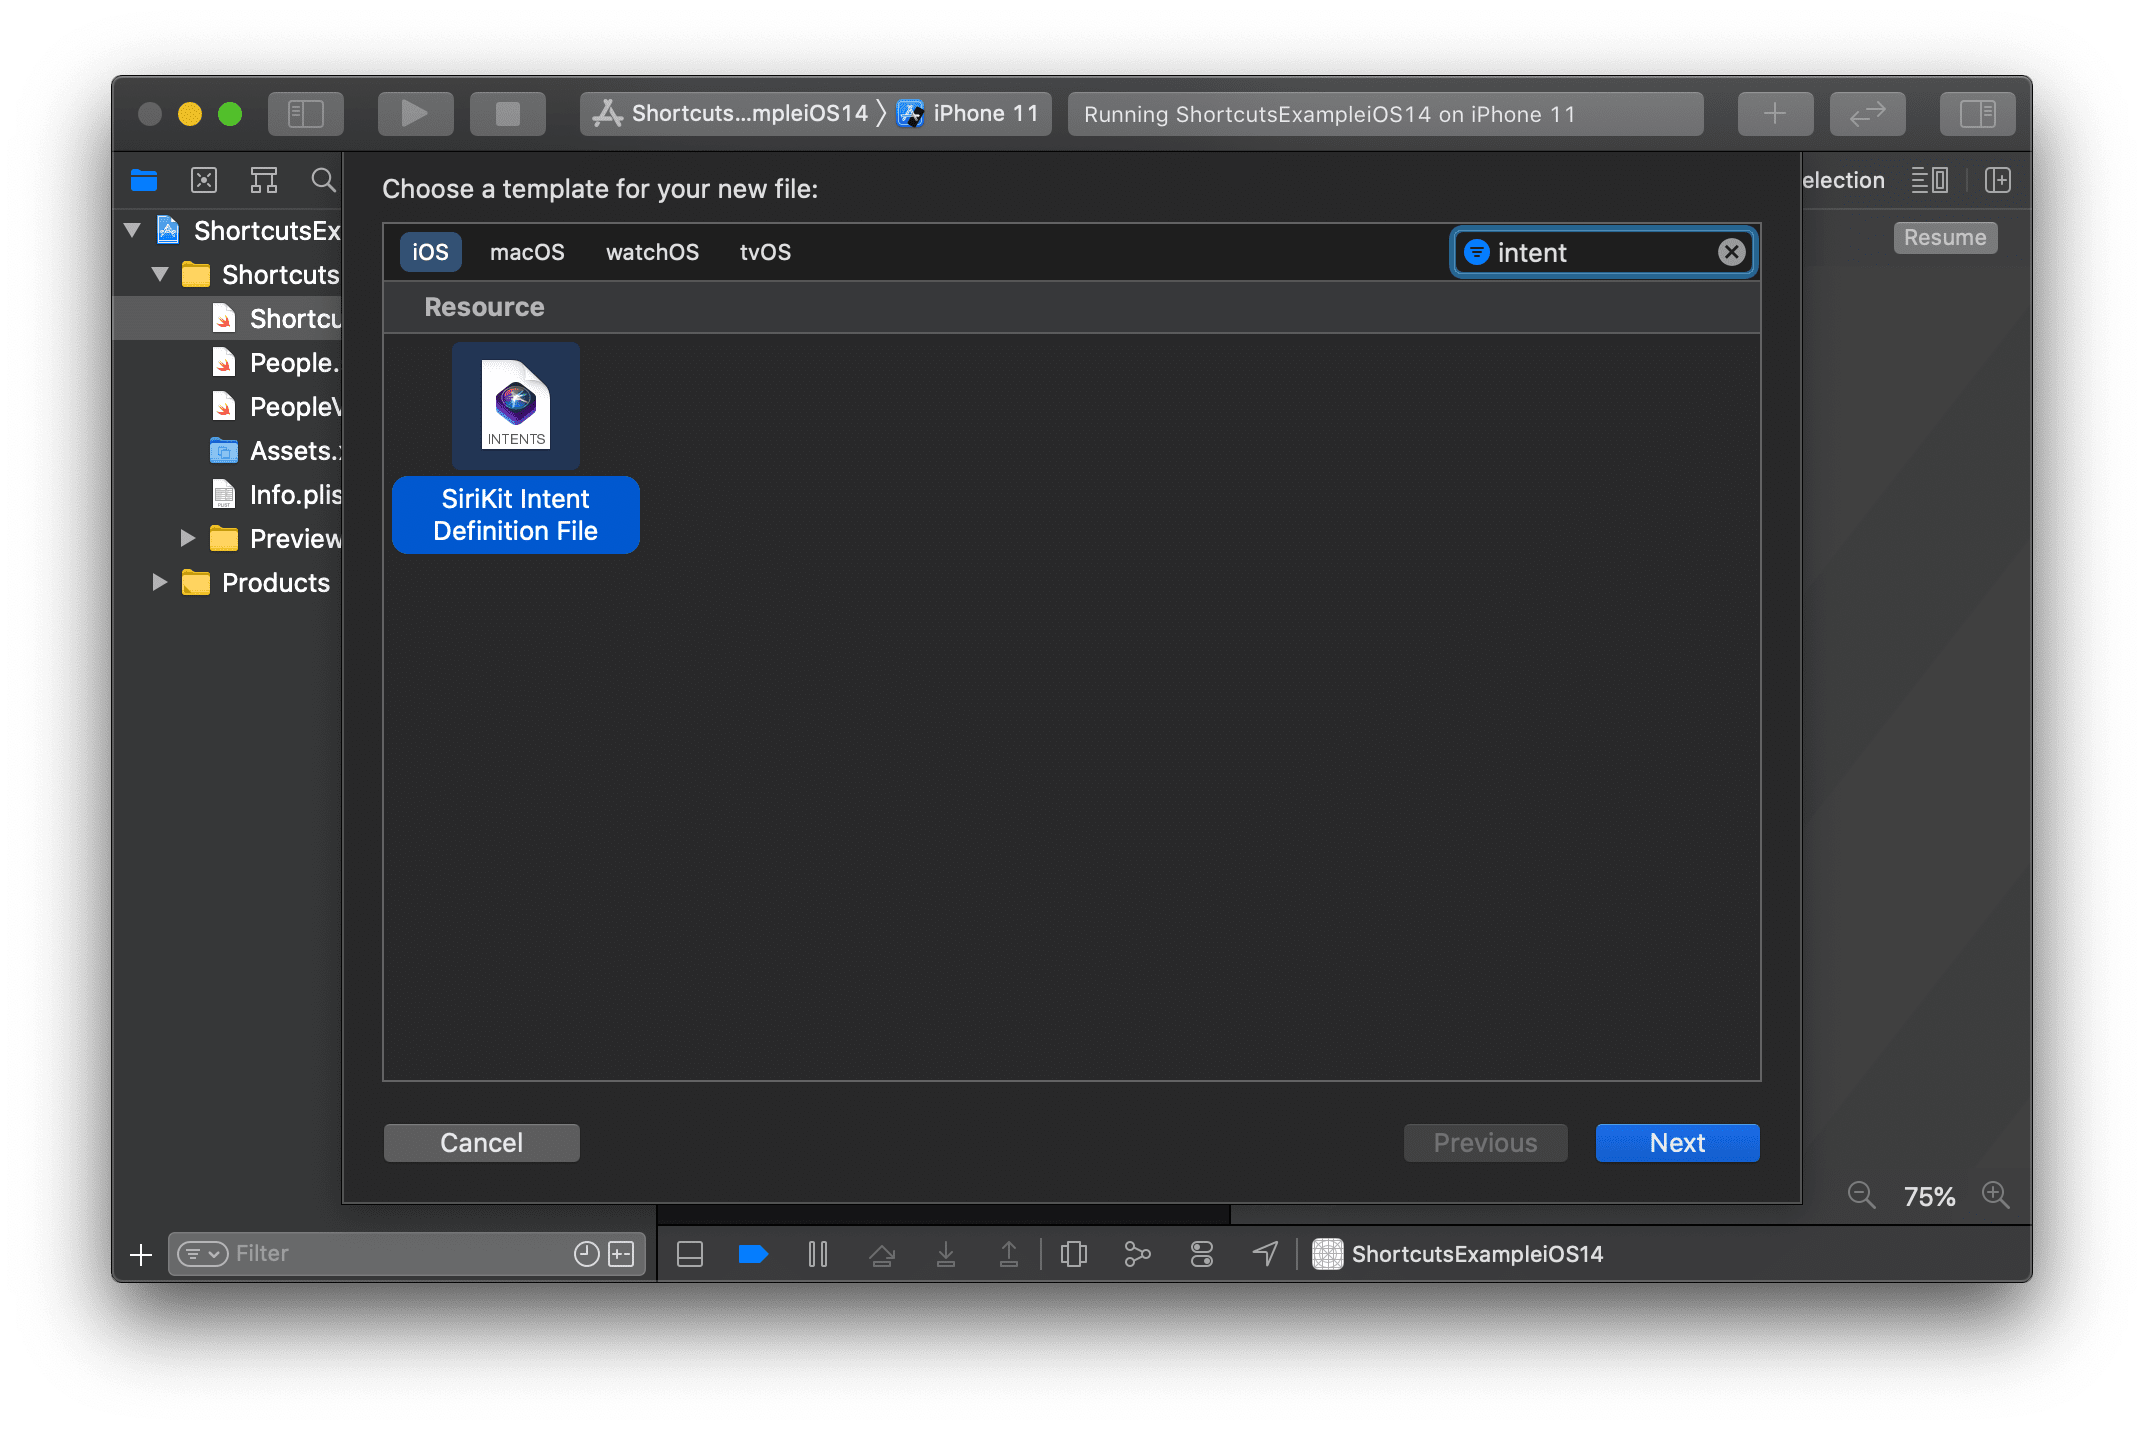
First we’ll add a new IntentDefinition file. Let’s leave it called Intents.
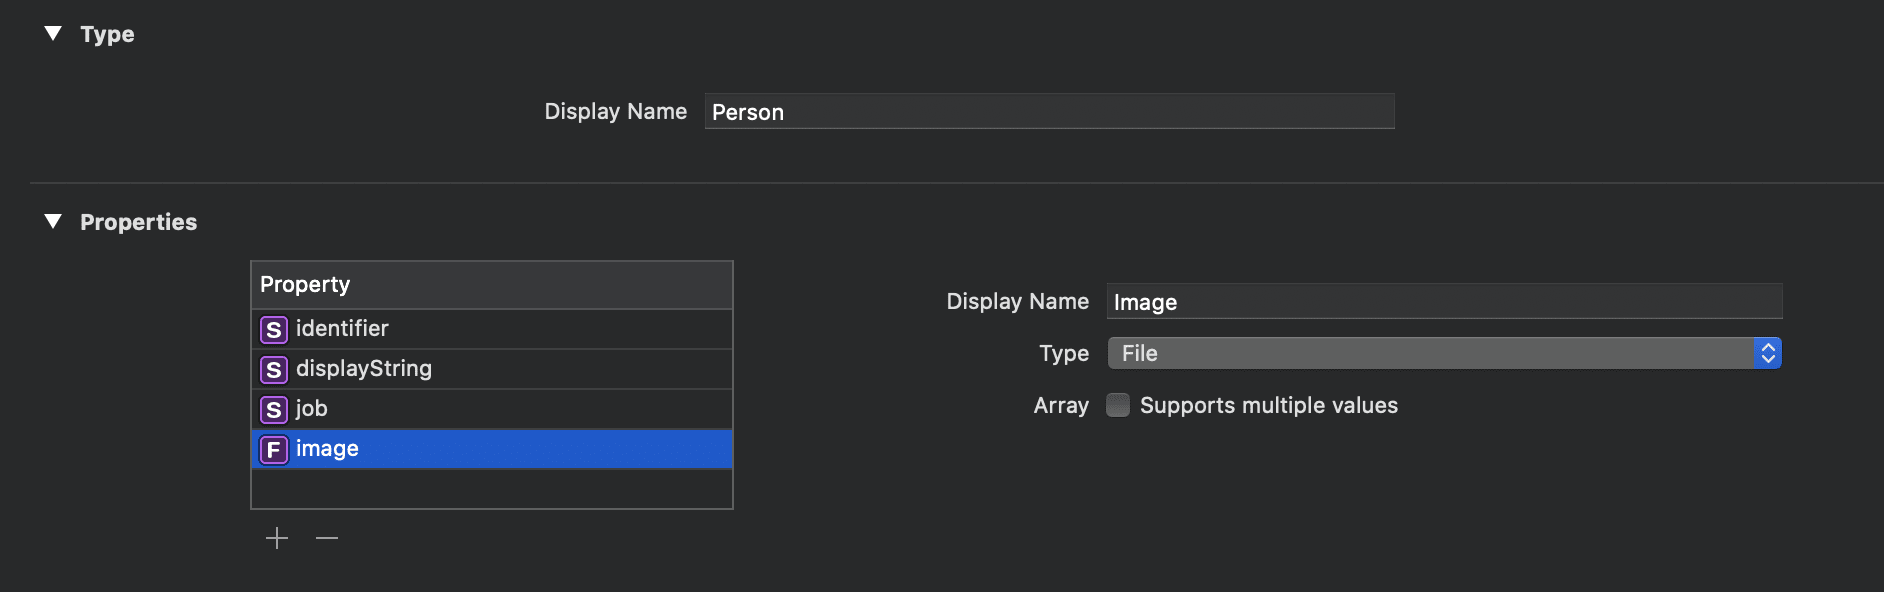
Now click on the ‘+’ and add a new custom type.
We’ll call it PersonShortcuts (since we don’t want this type to clash with the existing Person type, which we declared earlier).
Change the display name to “Person” and add two properties, a job string and an image file.
Step Six
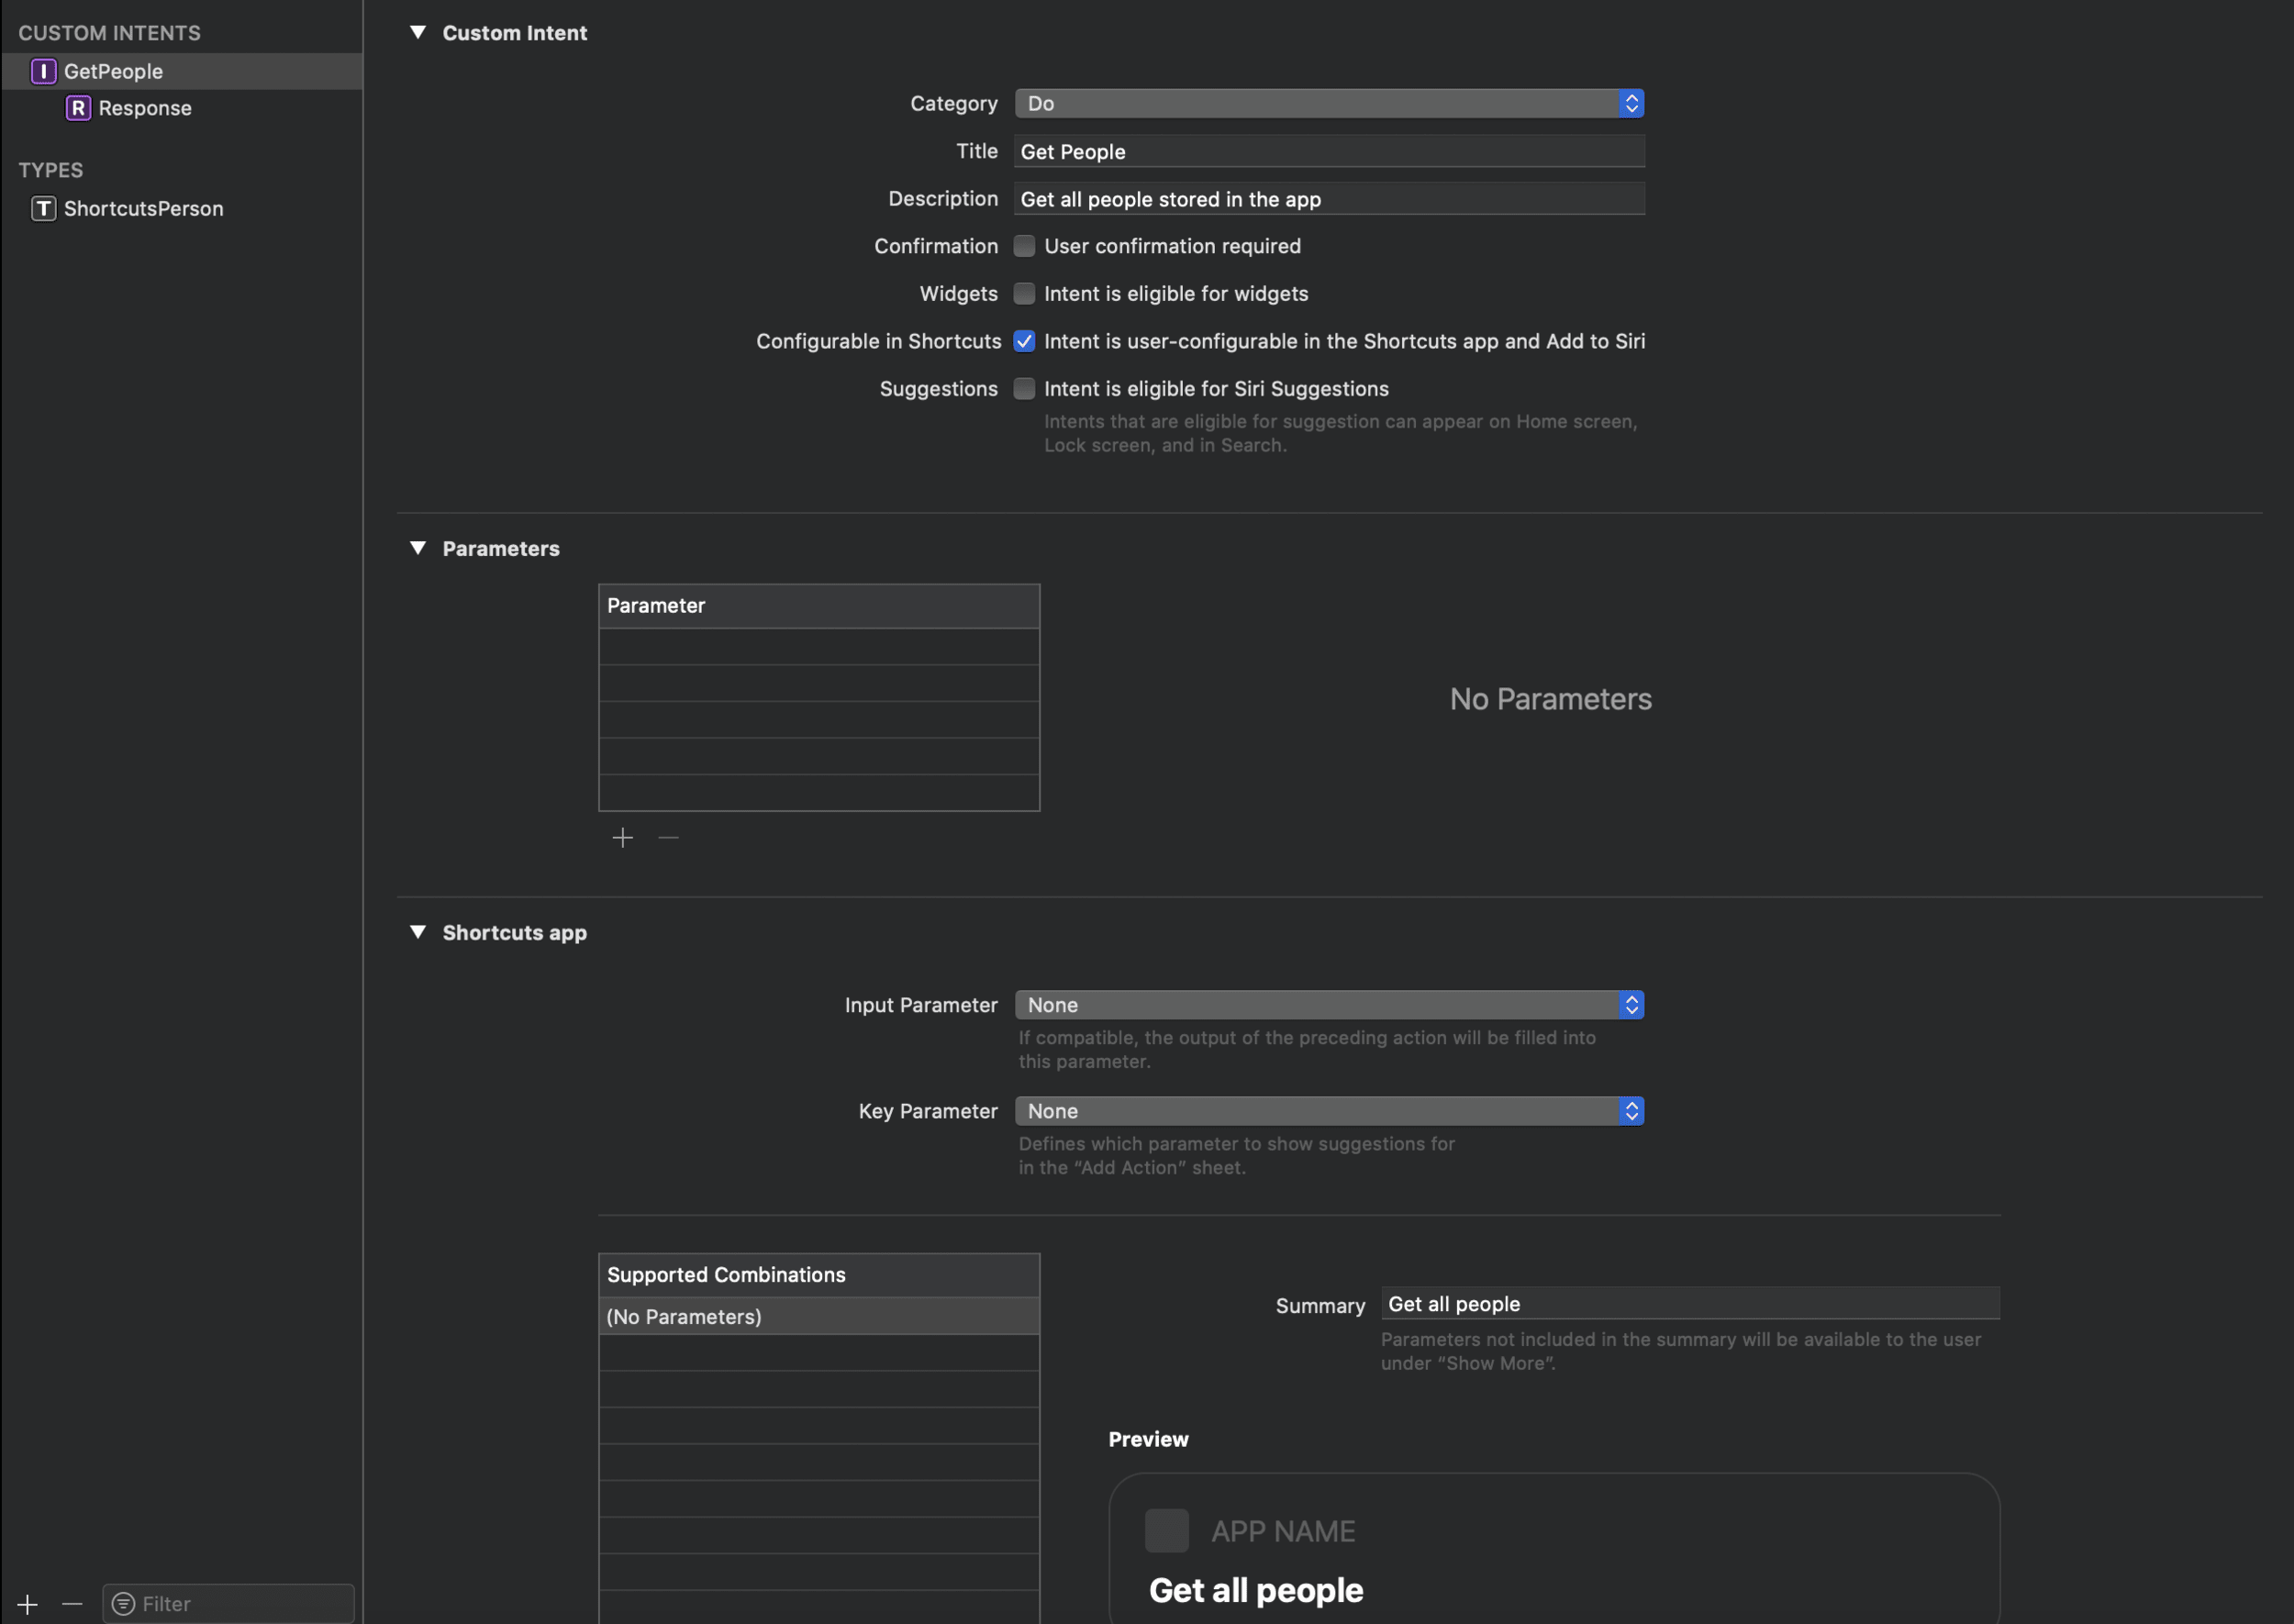
Let’s create our first Shortcuts action.
Hit ‘+’ again and this time add a new Intent.
This action will pull all the people stored in our app and return them as a custom output type in the Shortcuts app.
For this example we don’t need to add any parameters, just give it a title and description, deselect Intent Is Eligibile For Siri Suggestions and add a suitable summary that will be displayed on the shortcuts action.
Step Seven
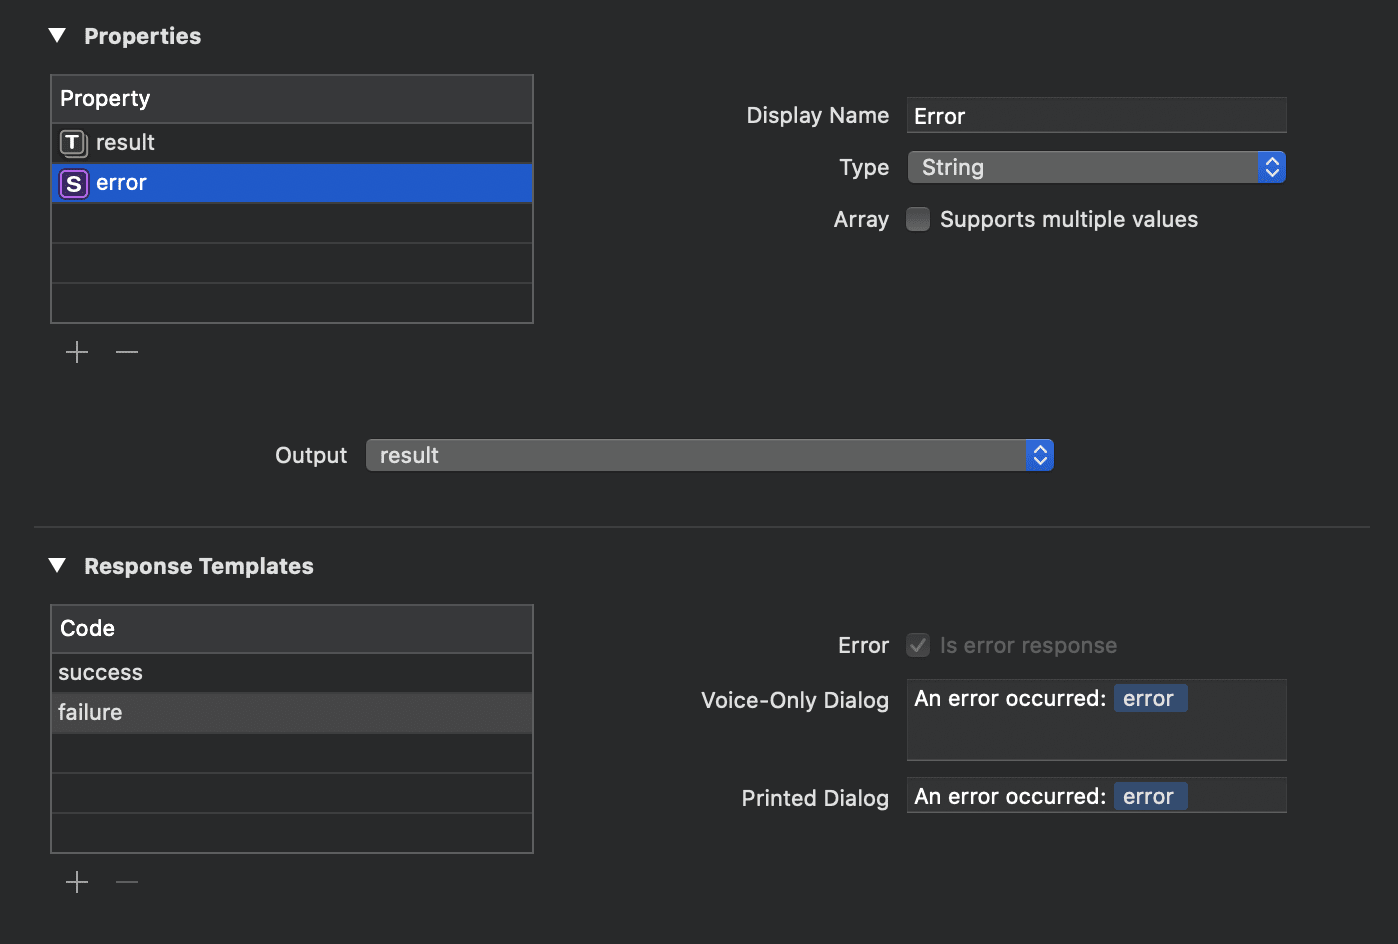
Now lets configure our intent’s response - what will be output from the action in the Shortcuts app.
Add a result property with a display name of “People”.
Set the type to the ShortcutsPerson type we added earlier (it will just display as “Person” in the drop-down list).
Make sure supports multiple values is checked, since we will be outputting multiple people from the action.
Select this property to be output and leave the success dialog options blank, since we don’t want to speak or display the results in the interface, we just want them to be passed to the next shortcuts action.
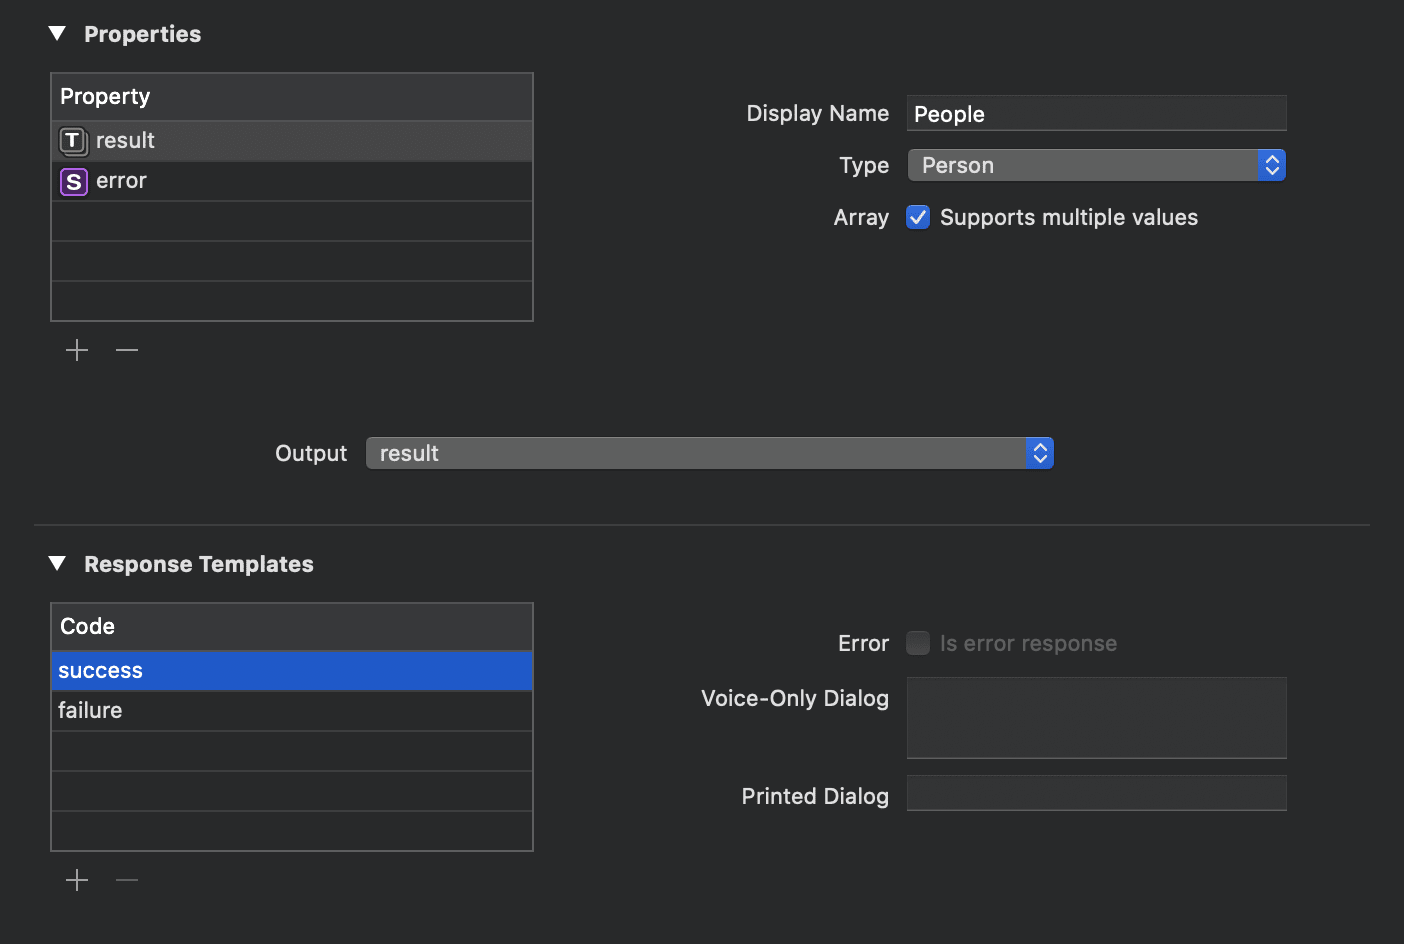
Now let’s add an error string property.
We’ll add dialog options since we want to throw up an error message if something goes wrong trying to retrieve the people from our app.
Step Eight
Add a new swift file called GetPeopleIntentHandler and define a new class which conforms to the NSObject and GetPeopleIntentHandling protocols.
Try and build the app and it’ll prompt you to add the stub needed to conform to the protocol.
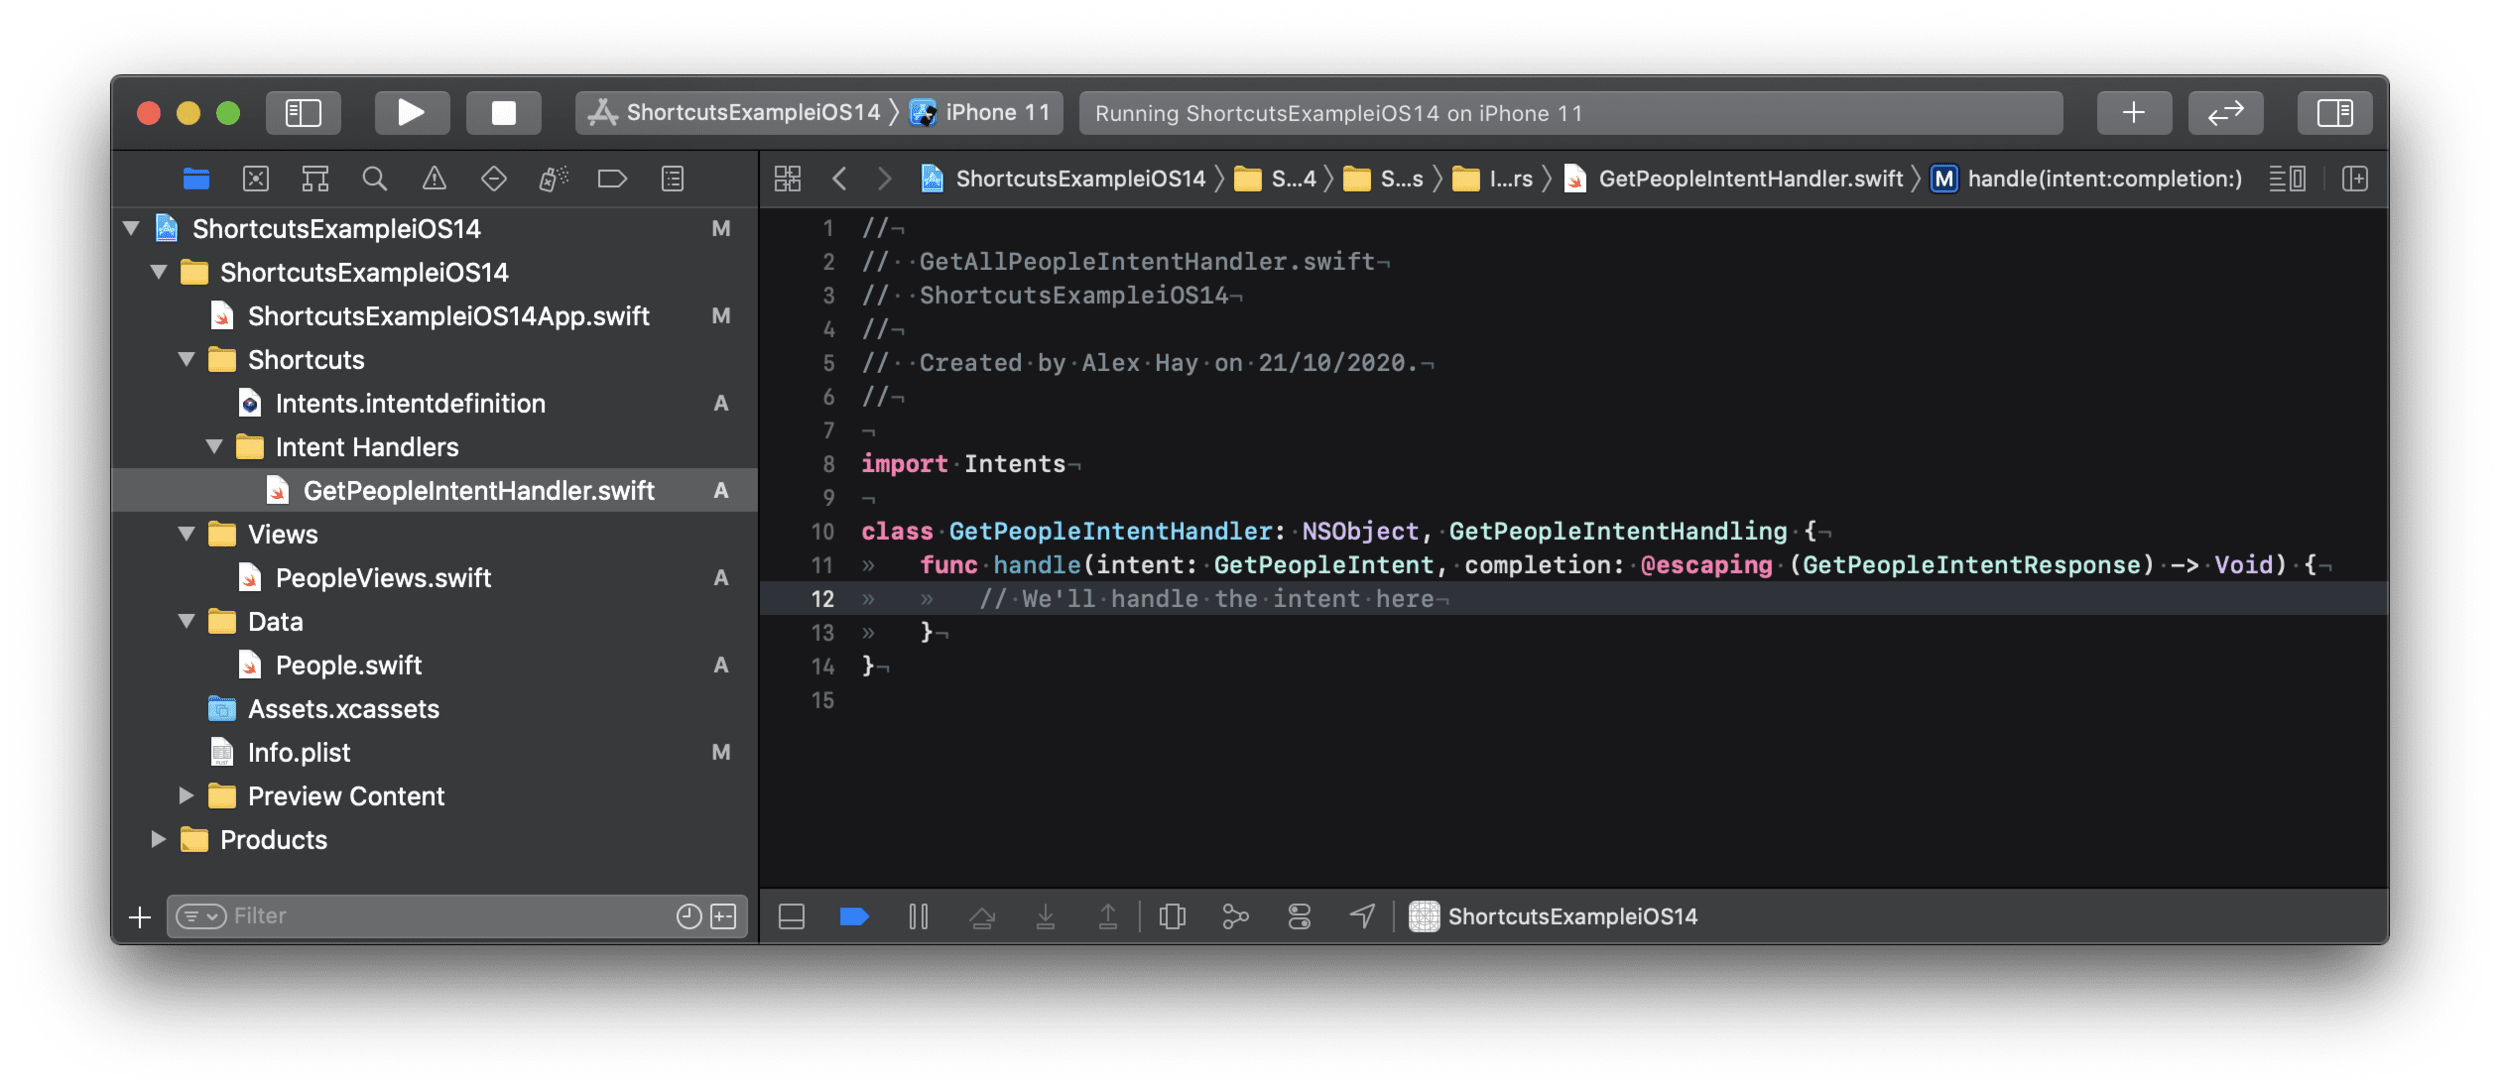
Now let’s write the code to handle our intent.
We’ll:
- Loop through our person array and create a new
ShortcutsPersonfor each one - Create an image from the person’s
iconNameand add it to theShortcutsPerson. This is the Visual List API added in iOS14, which will display that image next to each item in Shortcuts lists - Handle any errors that may occur
- Form our response and return the new array of
ShortcutsPersonobjects
import Intents
import UIKit

class GetPeopleIntentHandler: NSObject, GetPeopleIntentHandling {
	func handle(intent: GetPeopleIntent, completion: @escaping (GetPeopleIntentResponse) -> Void) {
		// Define an empty array of our custom ShortcutsPerson type
		var resultArray = [ShortcutsPerson]()
		// Loop through our people array and create new ShortcutsPerson objects which are added to our result array
		for person in peopleArray {
			// The new 'Visual List' API accepts an optional INImage thumbnail to display next to the display name in Shortcuts lists. Here, we're creating one from the SFSymbol names stored in our people array
			let thumbnail = INImage.systemImageNamed(person.iconName)
			let resultPerson = ShortcutsPerson(identifier: nil, display: person.name, subtitle: person.job, image: thumbnail)
			// Populate our ShortcutsPerson's properties
			resultPerson.job = person.job
			if let imageData = UIImage(systemName: person.iconName)?.jpegData(compressionQuality: 1.0) {
				resultPerson.image = INFile(data: imageData, filename: "\(person.name).jpg", typeIdentifier: "public.jpeg")
			} else {
				// We'll display an error if we can't create a UIImage from the person's iconName
				let errorResponse = GetPeopleIntentResponse.failure(error: "Couldn't create the user image for \(person.name). \"\(person.iconName)\" may not be a valid SFSymbol Name")
				completion(errorResponse)
				return
			}
			resultArray.append(resultPerson)
		}
		// We define a response marked as successful with the success code and add our result array to it
		let response = GetPeopleIntentResponse.init(code: .success, userActivity: nil)
		response.result = resultArray
		completion(response)
	}
}
In-App Intent Handling
Now that we have our intent and intent handler, we need to make sure it’s called when our action is run in the Shortcuts app.
Notice that unlike the previous tutorials, we haven’t had to add an Intents Extension target to our app.
This is because we’ll be using In-App Intent Handling, which was added in iOS14.
When the shortcuts action is run, instead of firing up just the intents extension part of the app (which is highly memory-constrained), we can now access the entirety of our app.
It is launched invisibily in the background, our intent handler fires and the result is output in the Shortcuts app.
One benefit of this is that it’s much easier to access data in our app. We don’t have to store our CoreData stack or UserDefaults in an app group so that both the app and intents extension targets can both access the same data.
It also means that the memory limitations of handling an intent in an intents extension are negated. We can now perform memory-intensive operations like applying filters to full-size images or performing machine learning tasks on files passed through a Shortcuts action. Previously, this would’ve caused a crash if the memory usage exceeded something like 30mb.
One caveat to in-app intent handling is that you have exactly 10 seconds to complete out of the intent handler before Shortcuts throws a time-out error.
This 10 seconds also includes the time to fire up the app in the background so it wouldn’t be appropriate a lengthy task like encoding video, for example.
You can learn more about this in the Empower Your Intents video from WWDC 2020.
Step Nine
There are two steps to supporting in-app intent handling.
Firstly, we need to add our new intent to the supported intents list in our app’s target.
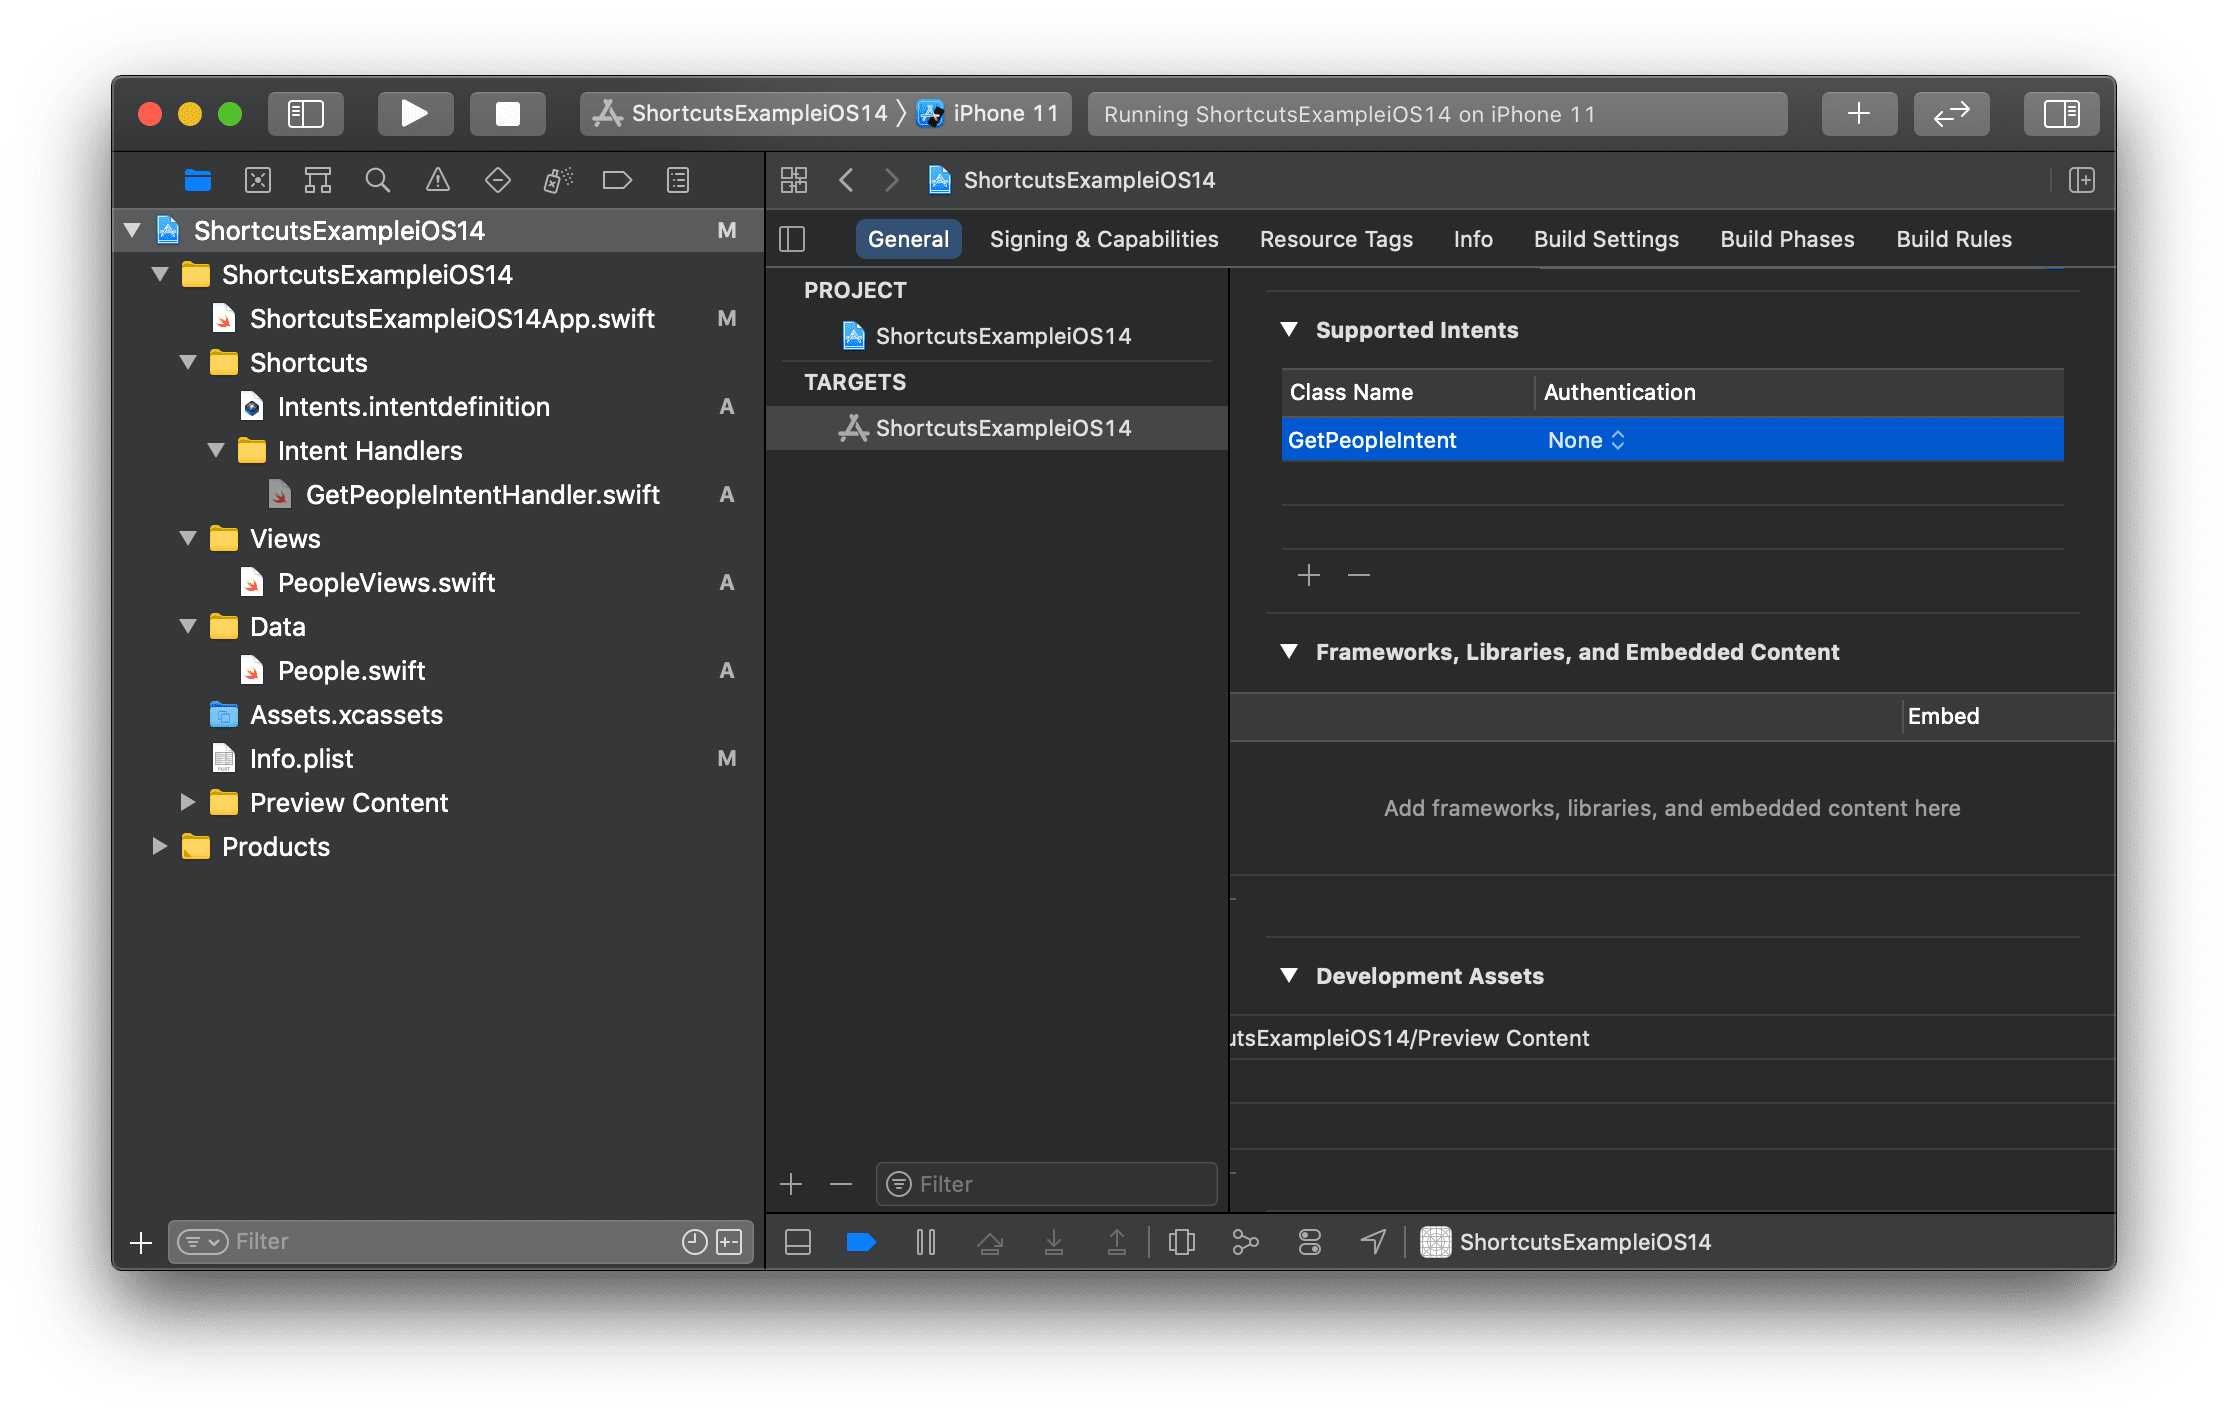
Secondly we need to respond to the GetPeople intent being called from the Shortcuts action using our intent handler.
To do this in a pure SwiftUI app, we can define a new class which conforms to the UIApplicationDelegate protocol.
You can read more about this here.
Change the code in ShortcutsExampleiOS14App.swift to look like this:
import SwiftUI
import Intents

@main
struct ShortcutsExampleiOS14App: App {
	@UIApplicationDelegateAdaptor(AppDelegate.self) var appDelegate

	var body: some Scene {
		WindowGroup {
			PeopleListView()
		}
	}

	// This class lets us respond to intents in an iOS14 SwiftUI app
	class AppDelegate: UIResponder, UIApplicationDelegate {
		func application(_ application: UIApplication, handlerFor intent: INIntent) -> Any? {

			switch intent {
				// If the intent being responded to is GetPeople, call the GetPeople intent handler
				case is GetPeopleIntent:
					return GetPeopleIntentHandler()
				default:
					return nil
			}
		}
	}

}
Step Ten
In the Shortcuts app, add the Get People action to a new shortcut and run it. You’ll see the three ShortcutsPerson objects are returned (as names).
If you add a Choose From List action after the Get People action, you’ll see our new visual list being displayed, including thumbnail images and subtitles.
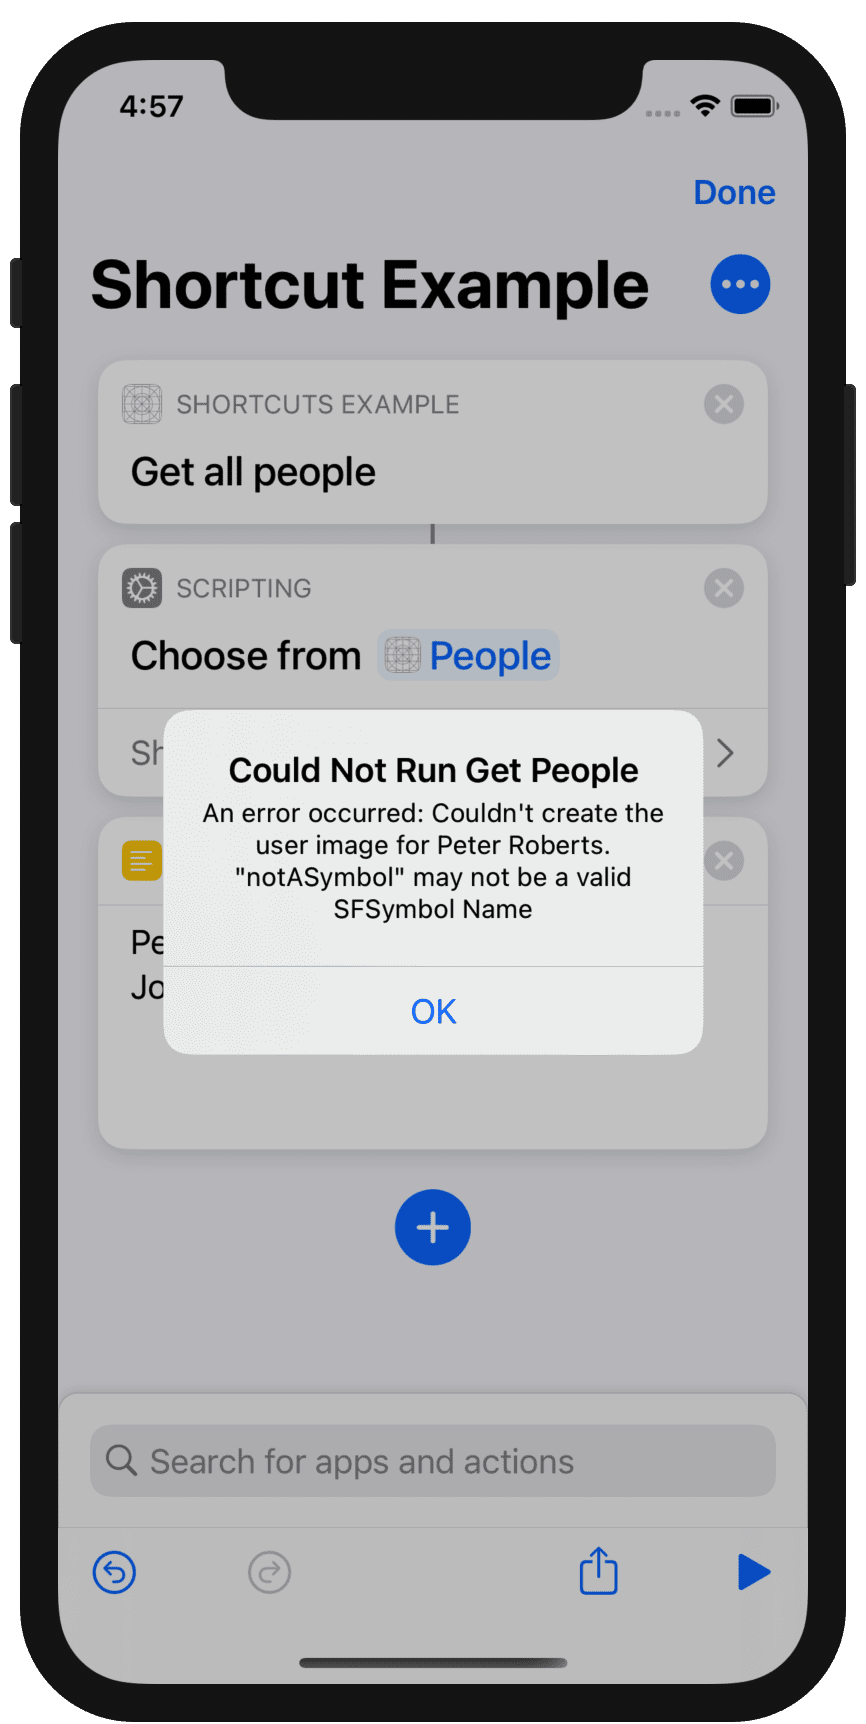
Change one of the iconNames in our peopleArray to an invalid SFSymbol name:
let peopleArray: [Person] = [
	Person(id: 1, name: "Joe Bloggs", job: "Artist", iconName: "paintpalette"),
	Person(id: 2, name: "Peter Roberts", job: "Taxi Driver", iconName: "notASymbol"),
	Person(id: 3, name: "Sarah Love", job: "Author", iconName: "text.book.closed")
]
Run the shortcut again, we’ll see the expected error thrown.
Summary
In this tutorial, we’ve learned about in-app intent handling, how to output custom types from our Shortcut action and how to add images and subtitles to be displayed in lists. We’ve also seen how it’s possible to handle intents from the new SwiftUI app protocol on iOS14.
In the next tutorial, we’ll be continuing this project to show how we can return data from a parameter in our Shortcuts action, back into our app for display.
These are the other posts in the series:
- Part 1: Creating a project and adding the first action
- Part 2: Exploring parameters: arrays, enums, calculated lists and files
- Part 3: In-app intent handling, custom output types, visual list API and using the SwiftUI app protocol
- Part 4: Visual Lists in parameters and pushing data from Shortcuts into a SwiftUI view
The complete code for the tutorials is also on GitHub:
- Parts 1 & 2 (iOS 13)
- Parts 3 & 4 (iOS 14)